The Ultimate Jekyll Chirpy Guide: From Installation to Successful Deployment
chirpy jekyll themeis a popular choice for developers and writers who want a clean, modern,It’s built on Jekyll, a static site generator, which means it’s fast, secure, and easy to host on platforms like GitHub Pages or Netlify. One of the great things about Chirpy is its focus on simplicity and readability. The design is minimalist, with a strong emphasis on typography and whitespace, making it a pleasure to read and navigate. 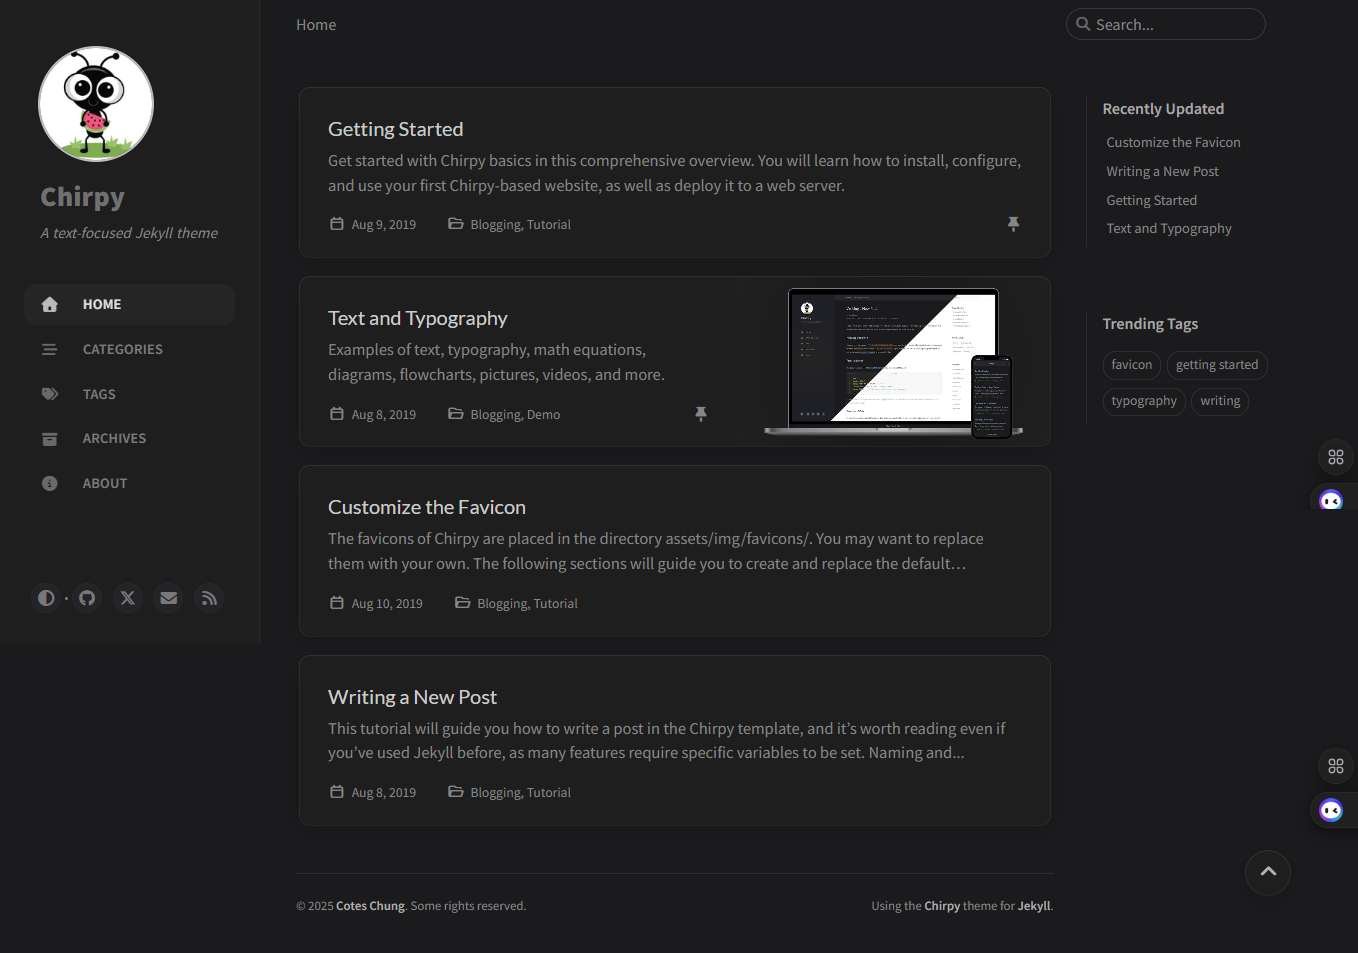
Setting up a this professional blog using the Jekyll Chirpy theme is rewarding, but the initial environment setup can be tricky. This guide covers everything from installing Ruby to fixing the most common “missing avatar” and “broken tags” issues.
1. Setting Up the Environment
Before you can run Chirpy, you need to turn your computer into a Jekyll-building machine.
Step A: Install Ruby
Jekyll is built on Ruby.
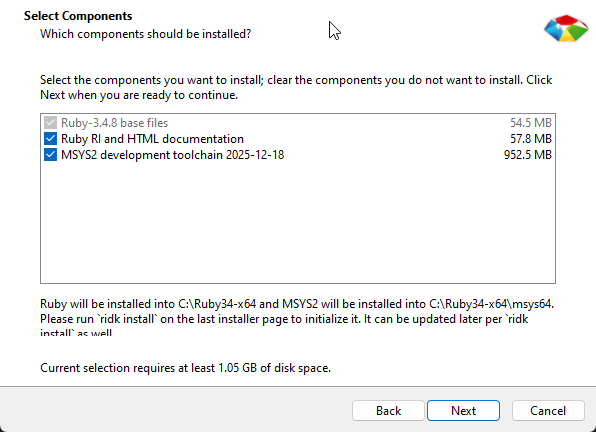
- Windows: Download the Ruby+Devkit from RubyInstaller. Choose the “x64” version. During installation, make sure “Add Ruby executables to your PATH” and MSYS2 development toolchain are checked.
- macOS: Use Homebrew:
brew install ruby.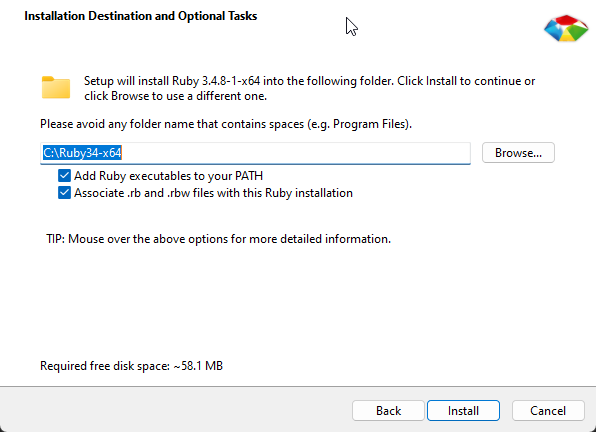
 During the installation choose number 3.
Step B: Install Gems and Bundler
“Gems” are Ruby packages. Bundler is a tool that manages the specific versions of Gems your blog needs. Open your terminal/command prompt and run:
1
gem install bundler jekyll
Step C: Initialize Your Project on Github
- Sign in to GitHub and navigate to the starter theme of Chirpy.
- Click the Use this template button and then select Create a new repository.
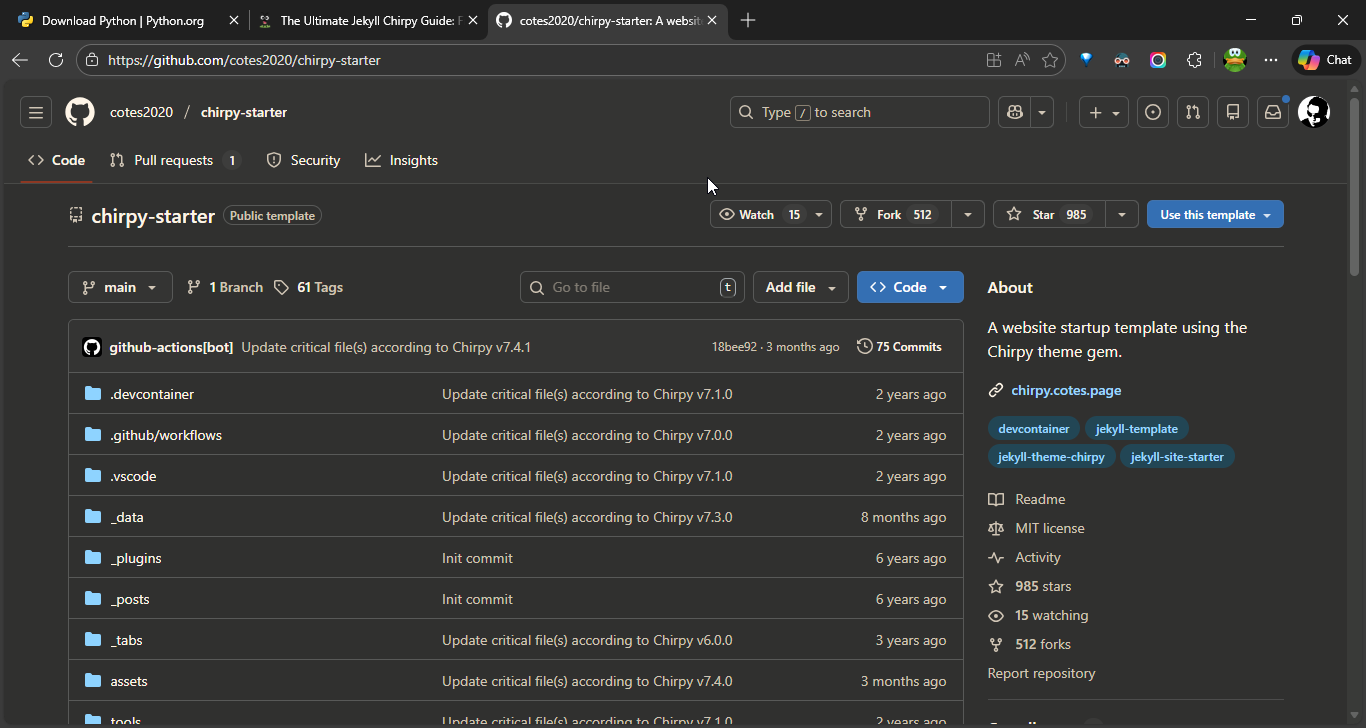
- Name the new repository <
user-name>.github.io, replacinguser-namewith your lowercase GitHubuser-name.
Step D: Initialize Your Project on Local PC
- Clone it to your PC: git clone https://github.com/user-name/user-name.github.io.git.
- Run command
bundlein the root of your repository to install the dependencies. - To run the site locally, use the following command:
1
bundle exec jekyll serve
- After a few seconds, the local server will be available at http://127.0.0.1:4000.
2. Deploy the blog on Github
Step A: Push Your Code to GitHub
Once your site runs locally without errors, it’s time to make it live.
- Navigate to your project folder in the terminal.
- Add and commit your changes:
1
2
3
git add .
git commit -m "Initial commit"
git push origin main
This uploads your blog to GitHub.
Step B: Configure GitHub Actions
- Go to your repository on GitHub.
- Now to to
settings -> pages -> Build and deploymentand selectGithub Actionas source.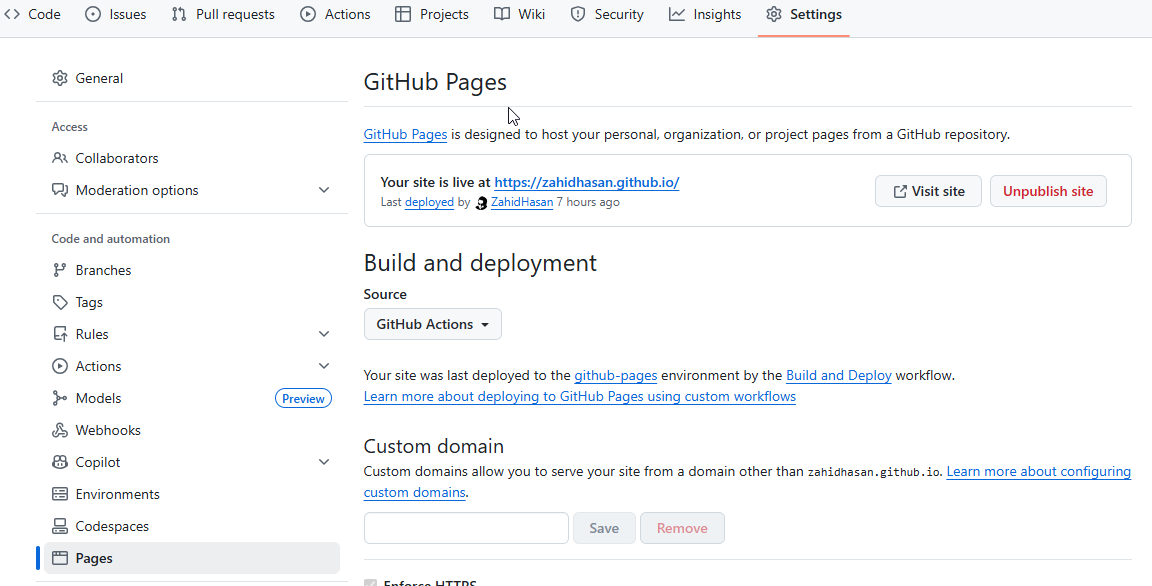
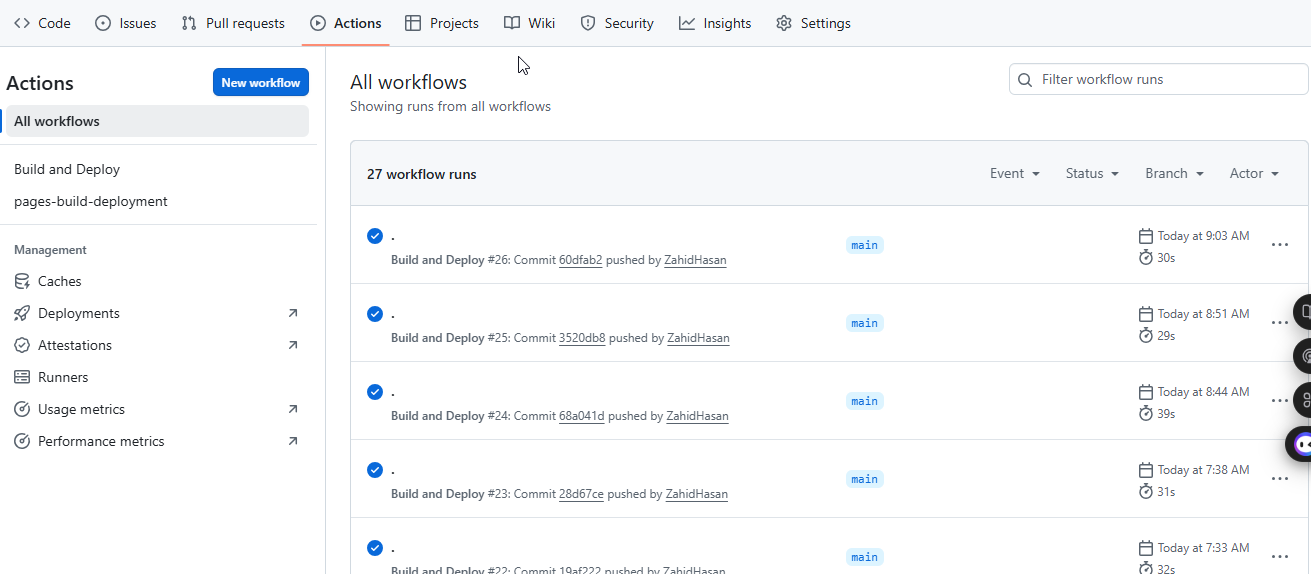
- GitHub will automatically detect the Jekyll workflow and start building your site.
- You can monitor progress under the Actions tab.
- Once the workflow completes successfully, your blog will be available at:
https://user-name.github.io
Step C: Common Deployment Fixes
- Missing Avatar: Ensure your avatar image is placed in ‘/assets/img/’ and referenced correctly in .
- Broken Tags/Categories: Double-check that tags and categories are properly formatted in your post front matter (no spaces, lowercase recommended).
- CSS/JS Not Loading: Verify that your baseurl in
_config.ymlis set correctly (usually empty for GitHub Pages).
🎉 Final Touch
You now have a professional blog powered by Jekyll Chirpy, running locally and deployed globally. With its minimalist design and strong typography, Chirpy helps you focus on writing while giving readers a clean, enjoyable experience. From here, you can:
- Customize
_config.ymlto add your social links, analytics, and branding. - Explore Chirpy’s built-in features like search, dark mode, and TOC.
- Write and publish posts regularly to grow your audience.
🚀 With Chirpy, you’re not just building a blog—you’re creating a polished platform for your ideas, ready to share with the world.