Unfortunately OpenCV doesn’t come with prebuilt mingw/TDM (64 bit) binaries for windows. In this tutorial, we are going to build them ourselves.
Environment setup
-
Download the source of OpenCV 3.2. Create the following folders:
C:\opencv\source
C:\opencv\build
-
Extract the zipped opencv to C:\opencv\source.
-
Download codeblocks without mingw. Because the default MinGW comes with codeblocks is 32 bit.
-
Download TDM 64 bit version. Install it in C:\ drive. it will look like C:\TDM-GCC-64\. The bin folder should be registered automatically in system path during the installation process, if not then using any path editor software you can do it manually. Set C:\TDM-GCC-64\bin\ folder in the system variable. Alternatively, you can use mingw 64bit
-
Download and install Cmake from here. Again the bin folder of cmake installation directory should be set in system path automatically, if not do it manually.
Making binaries
-
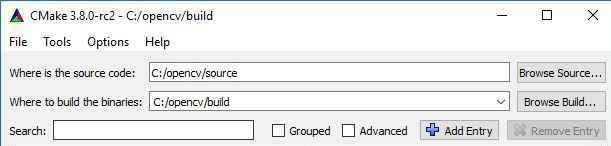
Open cmake, set source path to C:\opencv\source\ and binary path to C:\opencv\build.
-
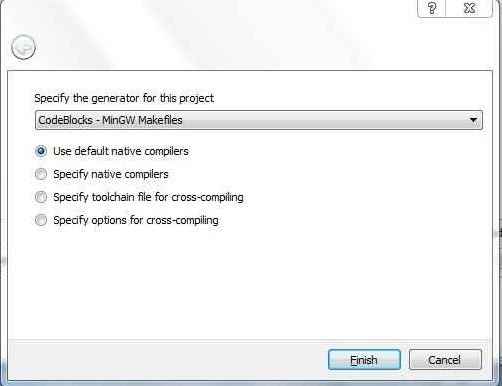
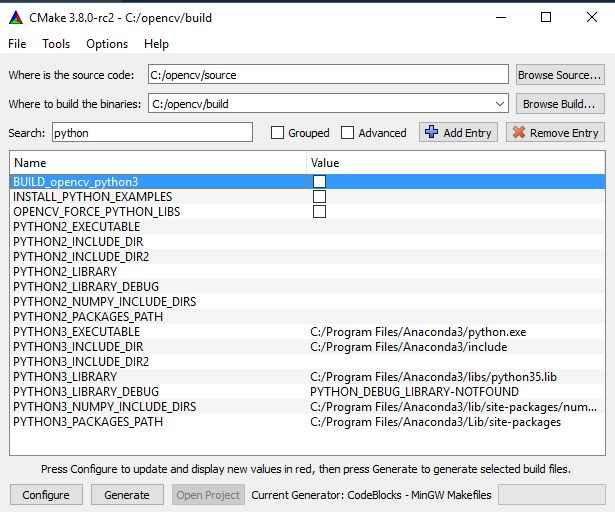
Hit configure button and from the drop-down menu select ‘codeblocks – MinGW Makefiles’ and press finish. When done uncheck all python stuff ( as it didn’t work on my pc). Now hit generate button.
-
you will find a codeblocks project file (opencv.cbp) in C:\opencv\build folder. Just double click it and codeblocks will load it.
-
Go to ‘settings‘, choose ‘compiler’ and click ‘Toolchain executable‘. In the ‘compiler’s installation directory‘ field choose the “bin” folder of MinGW C:\TDM-GCC-64\bin. set the following:
c compile: gcc.exe
c++ compiler: g++.exe
Linker for dynamic libs: ar.exe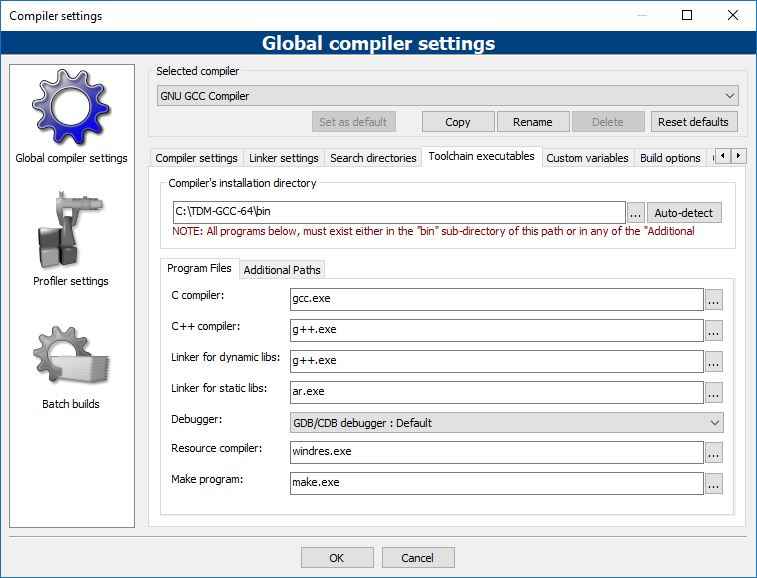
-
Finally, from codeblocks, you just need to build it. build target should be set to ‘install’ so that you can find all the binaries inside the ‘install’ folder of C:\opencv\build\install. Just go to ‘build ->select target -> install’ in the codeblocks menu and then hit ‘build->build’ button. Go get some tea :) Its gonna take some time (2-3 hour depending on the configuration of your pc).
-
After that set the path C:\opencv\build\install\x64\mingw\bin using path editor.
Running test program
-
Create a C++ project ‘Test’ in codeblocks.
-
Go to settings -> compiler. Select ‘search directories’ and in the ‘compiler’ tab chose the followings:
C:\opencv\build\install\include
C:\opencv\build\install\include\opencv
C:\opencv\build\install\include\opencv2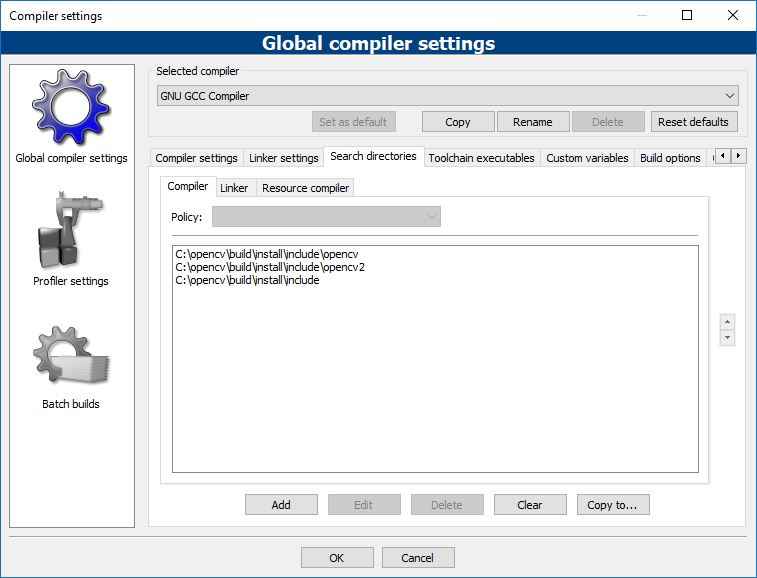
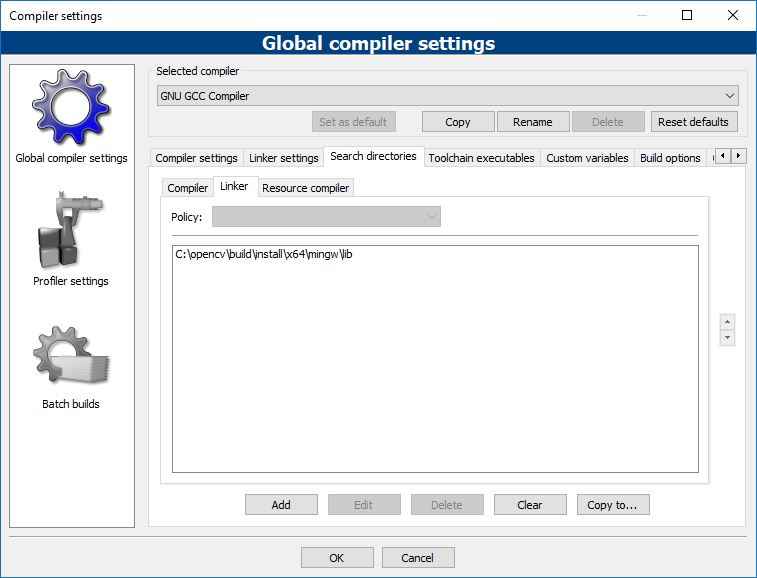
-
Select ‘Linker’ tab and add C:\opencv\build\install\x64\mingw\lib
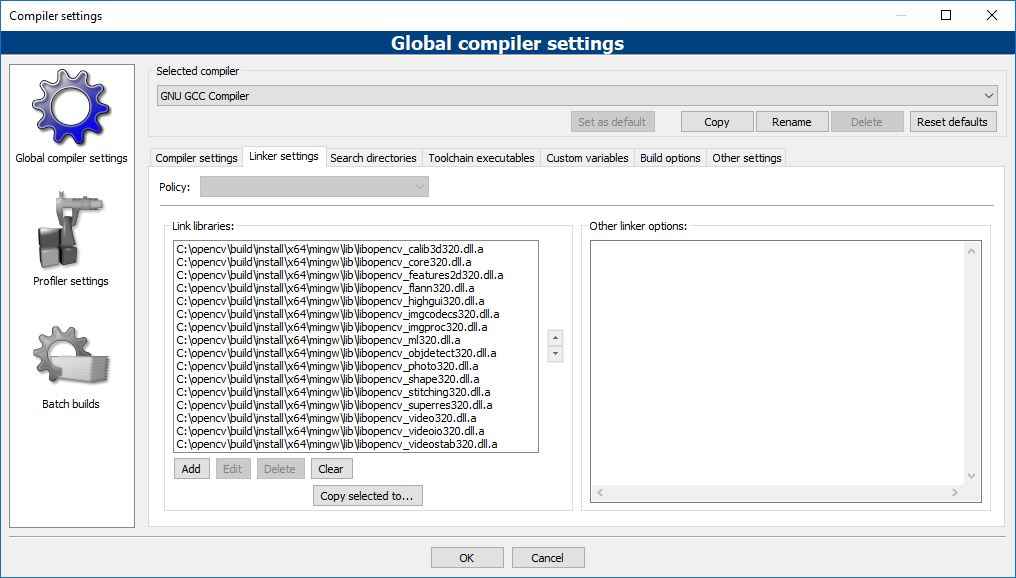
-
Under ‘Linker Settings’ tab add required libraries C:\OpenCV\my_build\install\x64\mingw\lib*.dll.a
Code
#include "core.hpp";
#include "highgui.hpp"
#include "imgcodecs.hpp"

using namespace cv;
using namespace std;

int main()
{
   Mat img;
   img = imread("pic.jpg");
   imshow("Original Image", img);
   waitKey();
}
Enjoy!